Automatization of quality control is indispensable and one of the easiest steps in securing efficiency of the glass production and customer satisfaction. Manual inspection is intensive, repeated, and unpleasant task. Besides giving unreliable results, it is also slow and covers only small part of the production. The use of modern scanners in today’s glass processing is thus obvious, but what should be considered when choosing a scanner for each process stage?
A few tips for choosing the right scanner:
1. Suitable technology for each process stage
There is no universal scanner which does everything. Some of the scanners are used for inspection, others for providing data for process control. A scanner which is designed to detect scratches is based on different technology than a scanner which measures distortions.
2. Right position in the process
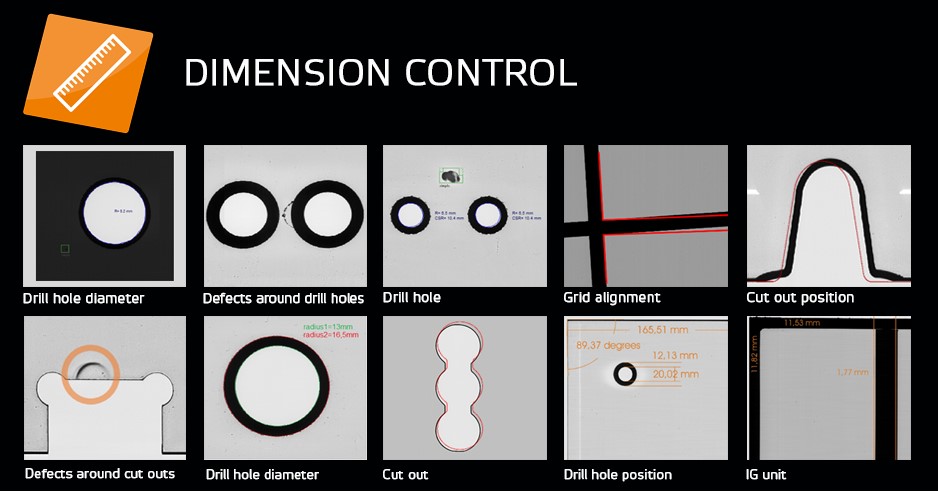
Defects should be detected as early as possible to avoid wasting capacity in further processing of defective glass. There is a right scanner for each process. For instance, edge work, dimensional control, holes, and notches should be measured right after the preprocessing. Tempering process impacts flatness, tensions, and surface quality. Therefore, distortions, anisotropy and white haze should be checked right after the tempering.
3. Comprehensive performance
Comprehensive performance of a scanner pays off. The standards for tempered glass define flatness only for roller waves, edge lift and overall bow, but tempering causes other distortions as well. Instead of the plain inspection to comply with the norm, you can improve your process performance by checking the glass also for picture frame, hammer distortion, cross conveyor distortion, bi-stable glass and other distortions. As option also white haze and anisotropy. The most advanced systems recognize trends and have inbuilt advisors flagging the operator before rejection limit is passed.
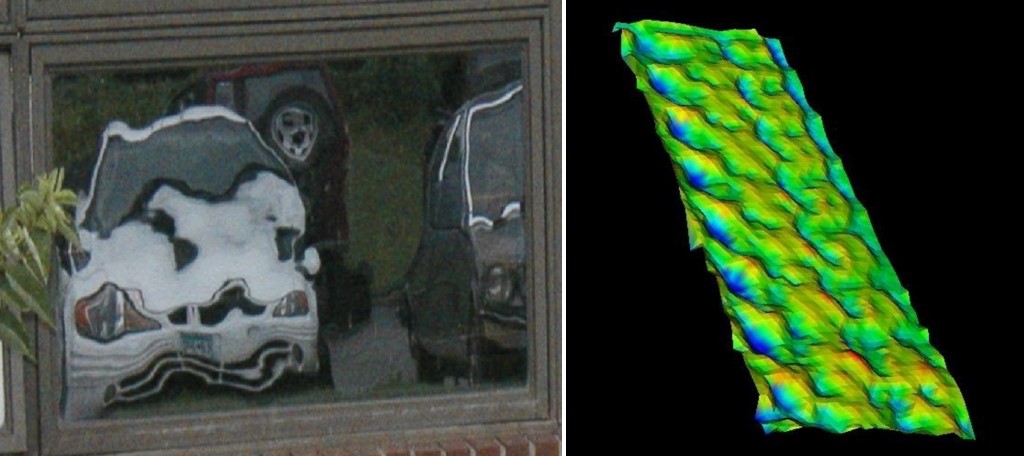
Instead of limiting the inspection only to roller waves and edge lift, all the distortions should be detected and measured. For instance, pocket distortion can only be detected by the most comprehensive measuring system. Pocket/ hammer distortion in the picture as seen on a façade and as measured. Photo by LiteSentry.
4. Compatibility
Make sure the scanner is compatible with standards and match with your customers’ needs. For instance, recently published ASTM C1901 is a standard procedure for measuring anisotropy in building glass. The measurement is based on retardance, and results are given in nanometers for a specified nm range. A scanner which indicates merely a percentage or other vague quantity does not comply with any standard and leaves room for interpretations and disagreement.

Optical quality and anisotropy are receiving increasing attention by the architects and façade builders. Despite being not considered as a defect, anisotropy is more often discussed and thresholds for acceptance are included in the acceptance specification. This tendency is also seen in Europe. The ability of defining the quality objectively according to a standard, such as ASTM, gives a glass company a clear competitive advantage over the competition.
5. Uppgrades and Options
Prioritize your needs if the budget is tight. Most of the equipment are upgradable. You can start measuring distortions and upgrade your equipment later by adding anisotropy inspection, or vice versa. The investment in a scanner pays anyways off. Further valuable features may also come available as updates, such as overall bow recognition and white haze prediction.
Author: Juha Karisola ©Akaan Trading Oy

